> ## Documentation Index
> Fetch the complete documentation index at: https://docs.hyperrails.io/llms.txt
> Use this file to discover all available pages before exploring further.
# Your Team Members
> Invite team members to your HyperRail dashboard and manage their access using predefined or custom roles.
## Overview
HyperRail allows you to **invite team members** to your dashboard and control what they can access using **roles and permissions**.\
This enables secure collaboration while ensuring sensitive actions are restricted to authorized users only.
***
## How to Add a Team Member
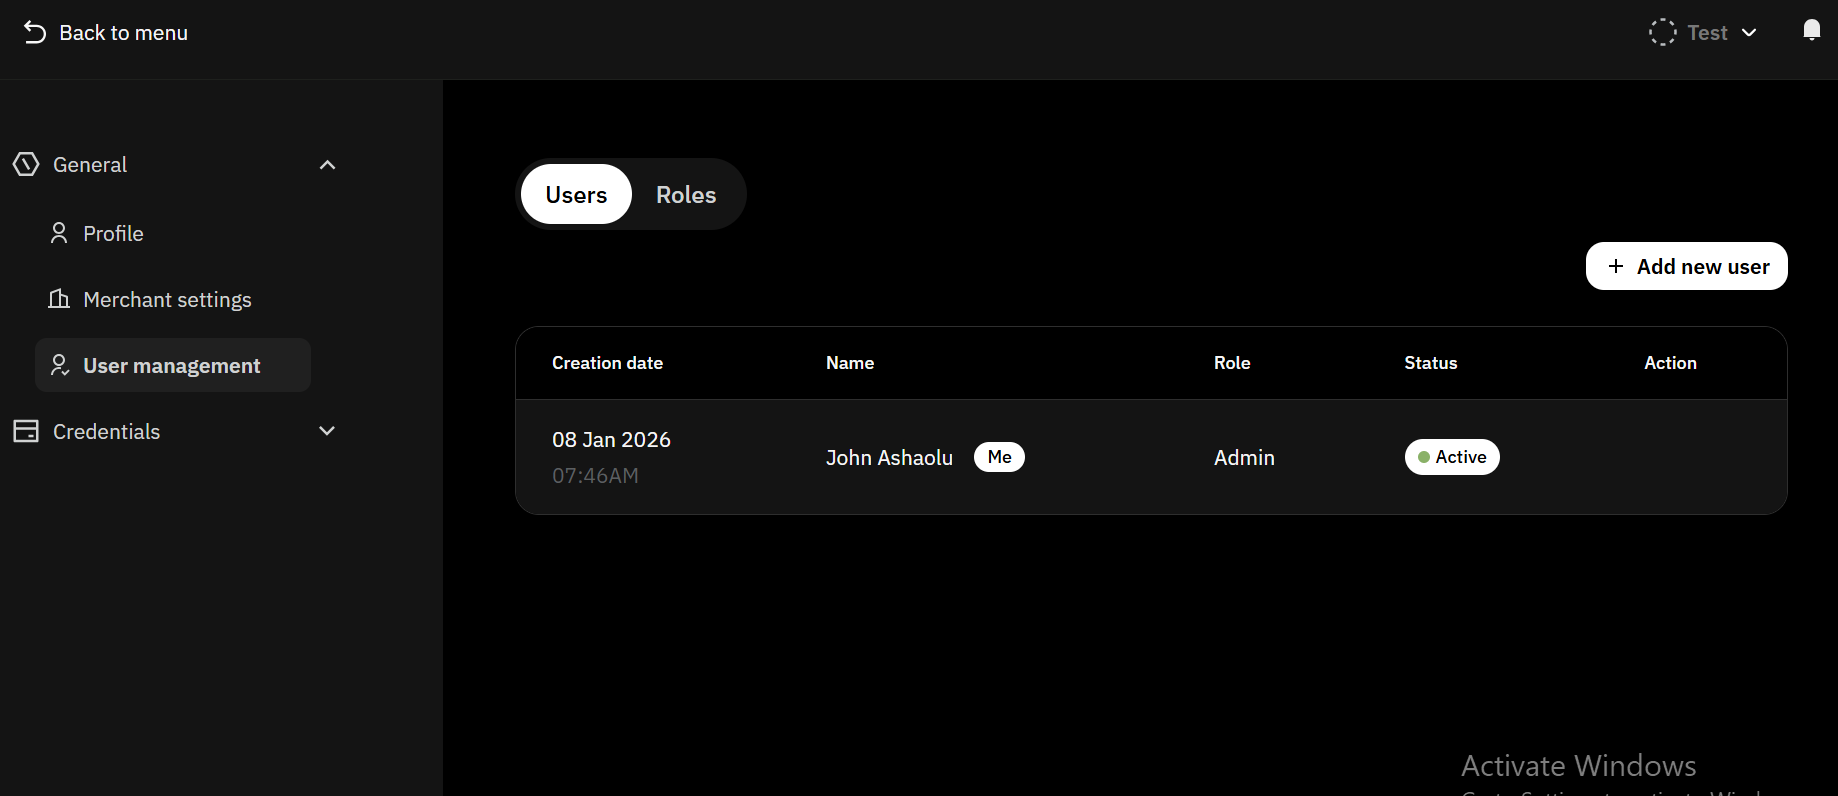 Navigate to the User Management section from your dashboard.
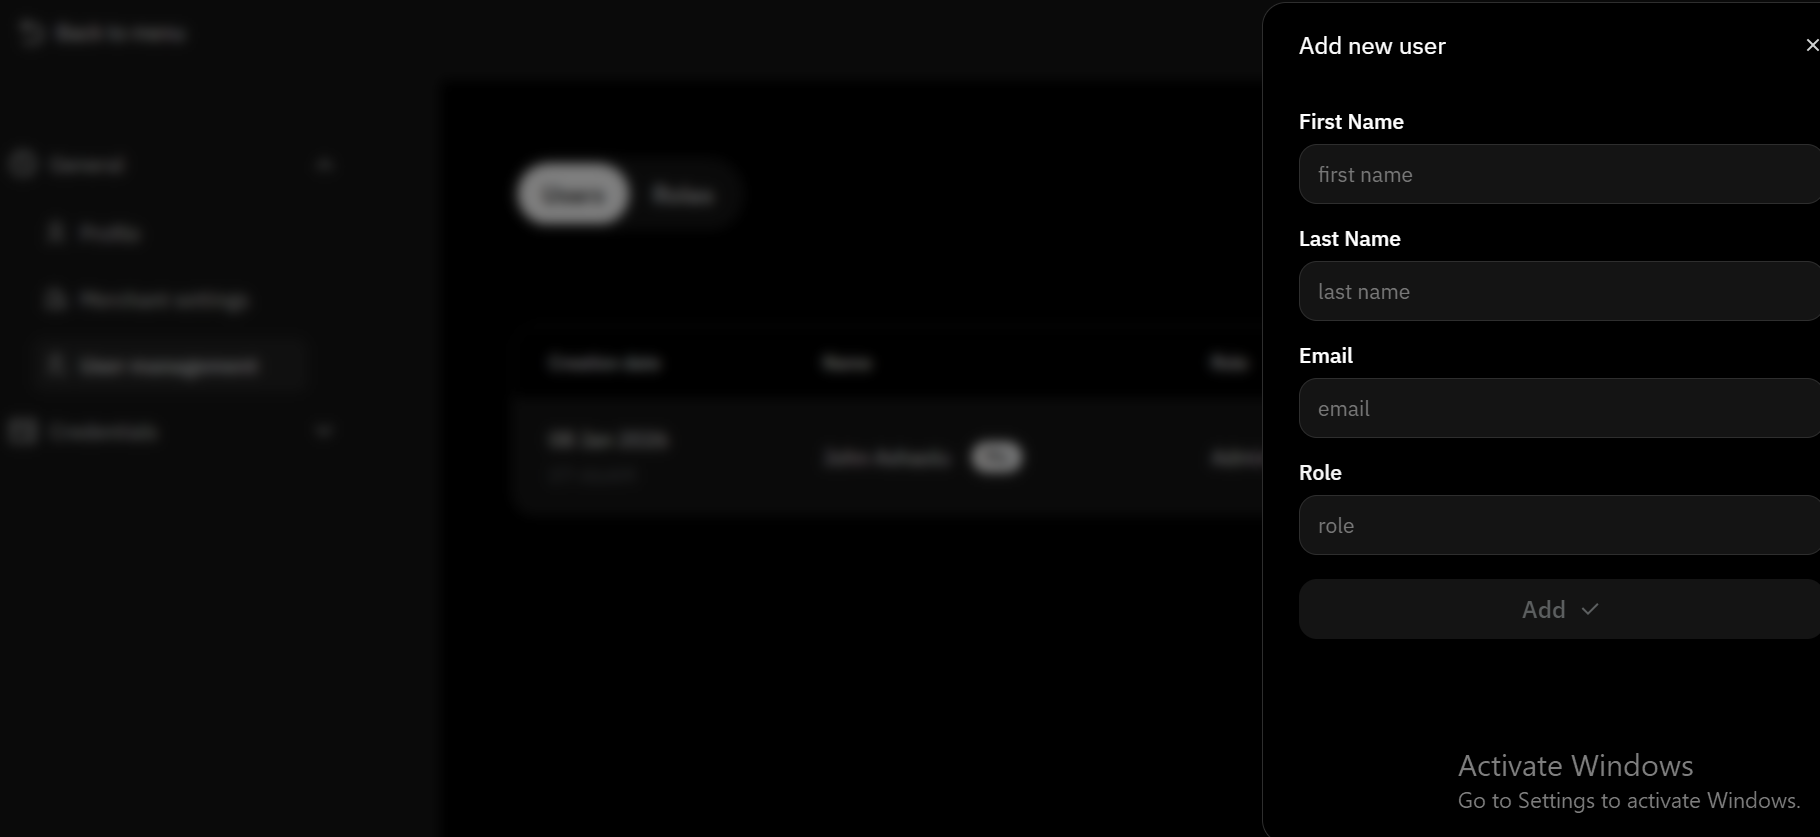 Click Add new user at the top-right of the page.
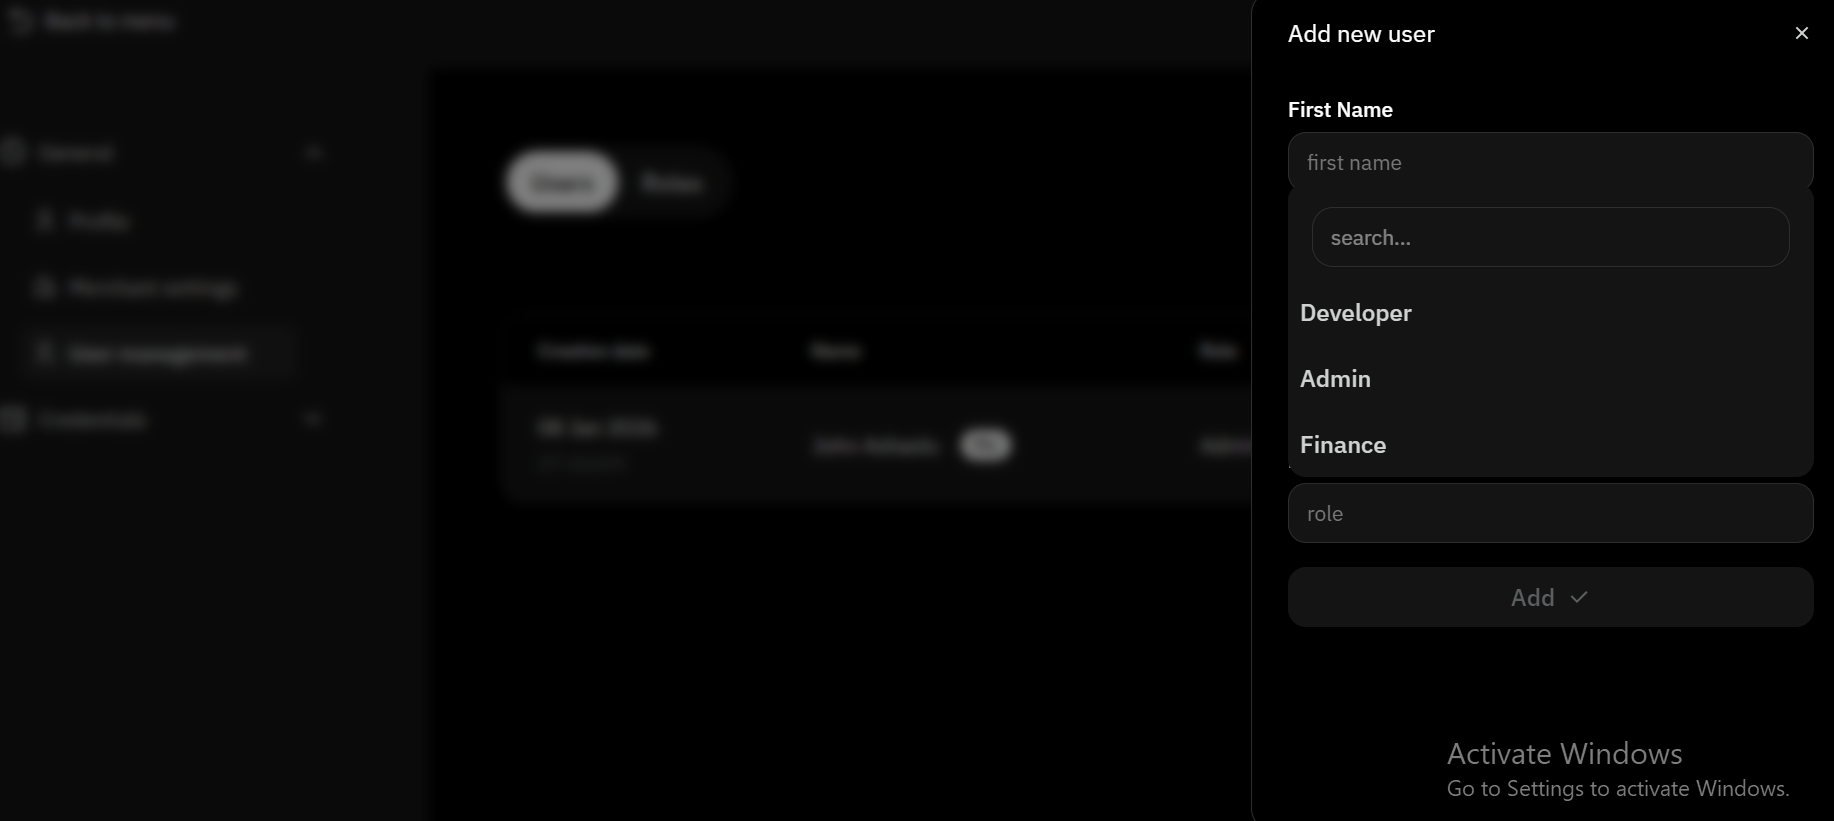 Enter the teammate’s email address and select an appropriate role.
Click Add to complete the process.
***
## How Team Members Access HyperRail
Invited users receive an **email invitation**.\
After accepting the invite, they:
* Set up their password
* Configure OTP (Authenticator App)
* Gain access based on their assigned role
***
## Default Roles & Permissions
HyperRail provides predefined roles with different access levels:
| Role | Access Level | Description |
| ------------- | ---------------- | ------------------------------------------------------------------------------------------------------------------------------------------------- |
| **Admin** | Full Access | Can manage users, roles, settings, and all financial operations. |
| **Finance** | Financial Access | Can view balances, perform exchanges, and manage payouts. |
| **Developer** | Technical Access | Can view and manage API Keys, Webhooks, and other technical configurations. Lacks access to balances, collections, or finance-related operations. |
***
## Custom Roles
Admins can create **custom roles** with tailored permissions to match their team’s operational needs.
Create roles that reflect real responsibilities — not everyone needs full access.
***
## How to Create Custom Roles
Enter the teammate’s email address and select an appropriate role.
Click Add to complete the process.
***
## How Team Members Access HyperRail
Invited users receive an **email invitation**.\
After accepting the invite, they:
* Set up their password
* Configure OTP (Authenticator App)
* Gain access based on their assigned role
***
## Default Roles & Permissions
HyperRail provides predefined roles with different access levels:
| Role | Access Level | Description |
| ------------- | ---------------- | ------------------------------------------------------------------------------------------------------------------------------------------------- |
| **Admin** | Full Access | Can manage users, roles, settings, and all financial operations. |
| **Finance** | Financial Access | Can view balances, perform exchanges, and manage payouts. |
| **Developer** | Technical Access | Can view and manage API Keys, Webhooks, and other technical configurations. Lacks access to balances, collections, or finance-related operations. |
***
## Custom Roles
Admins can create **custom roles** with tailored permissions to match their team’s operational needs.
Create roles that reflect real responsibilities — not everyone needs full access.
***
## How to Create Custom Roles
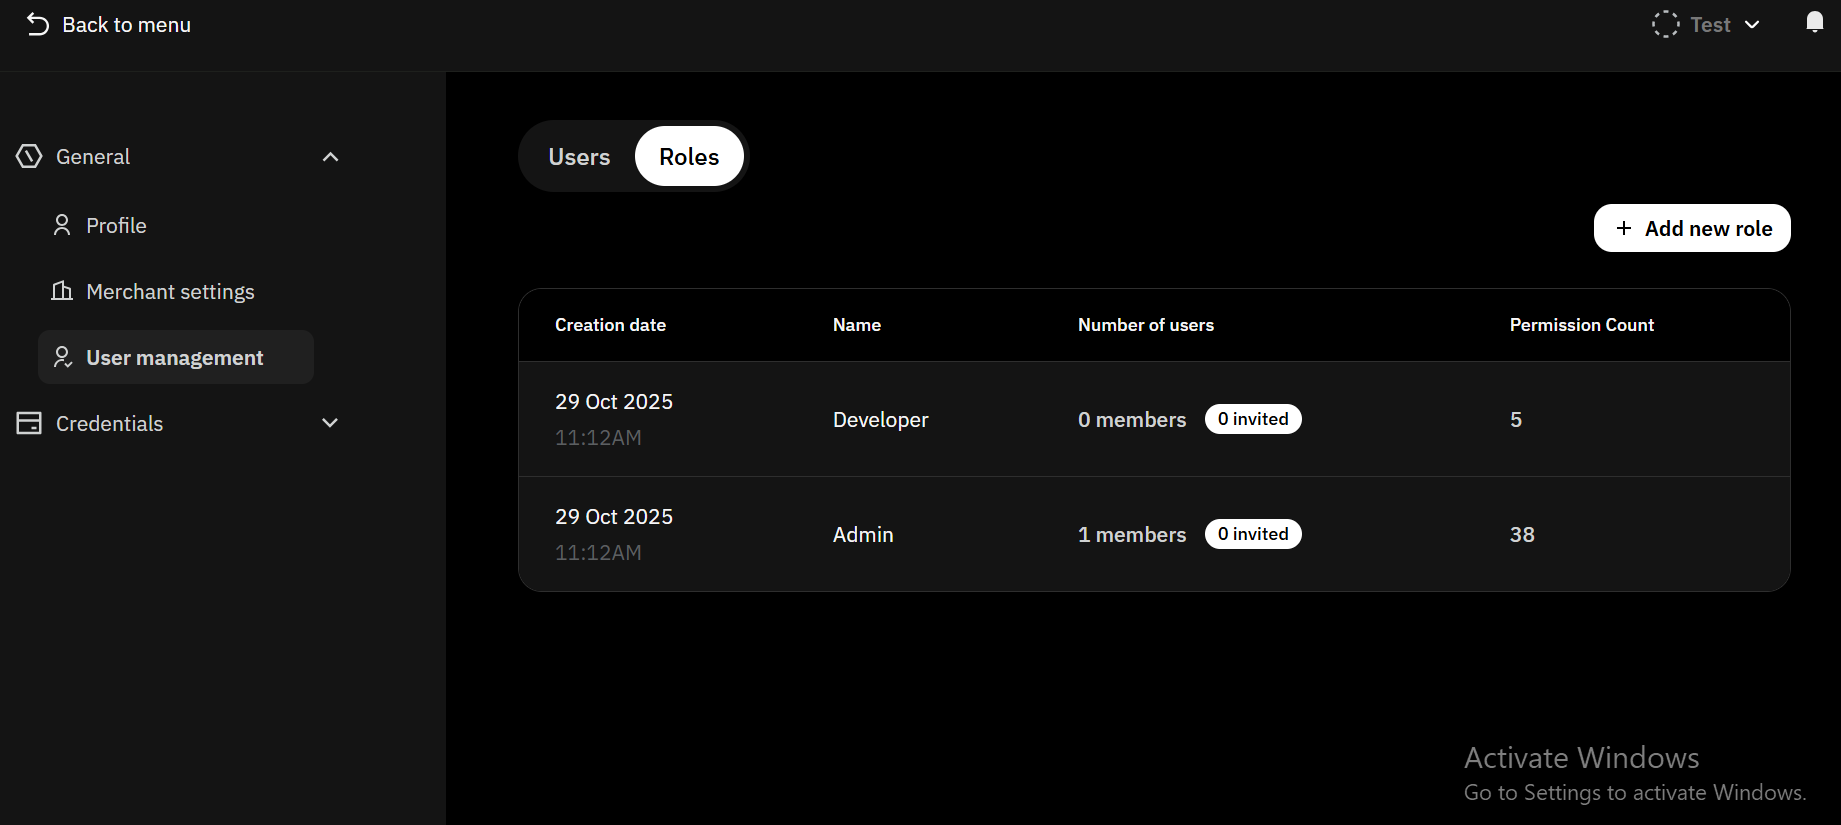 Navigate to the User Management section from your dashboard and select on the **Roles** tab. Click Add new Role to create a role.
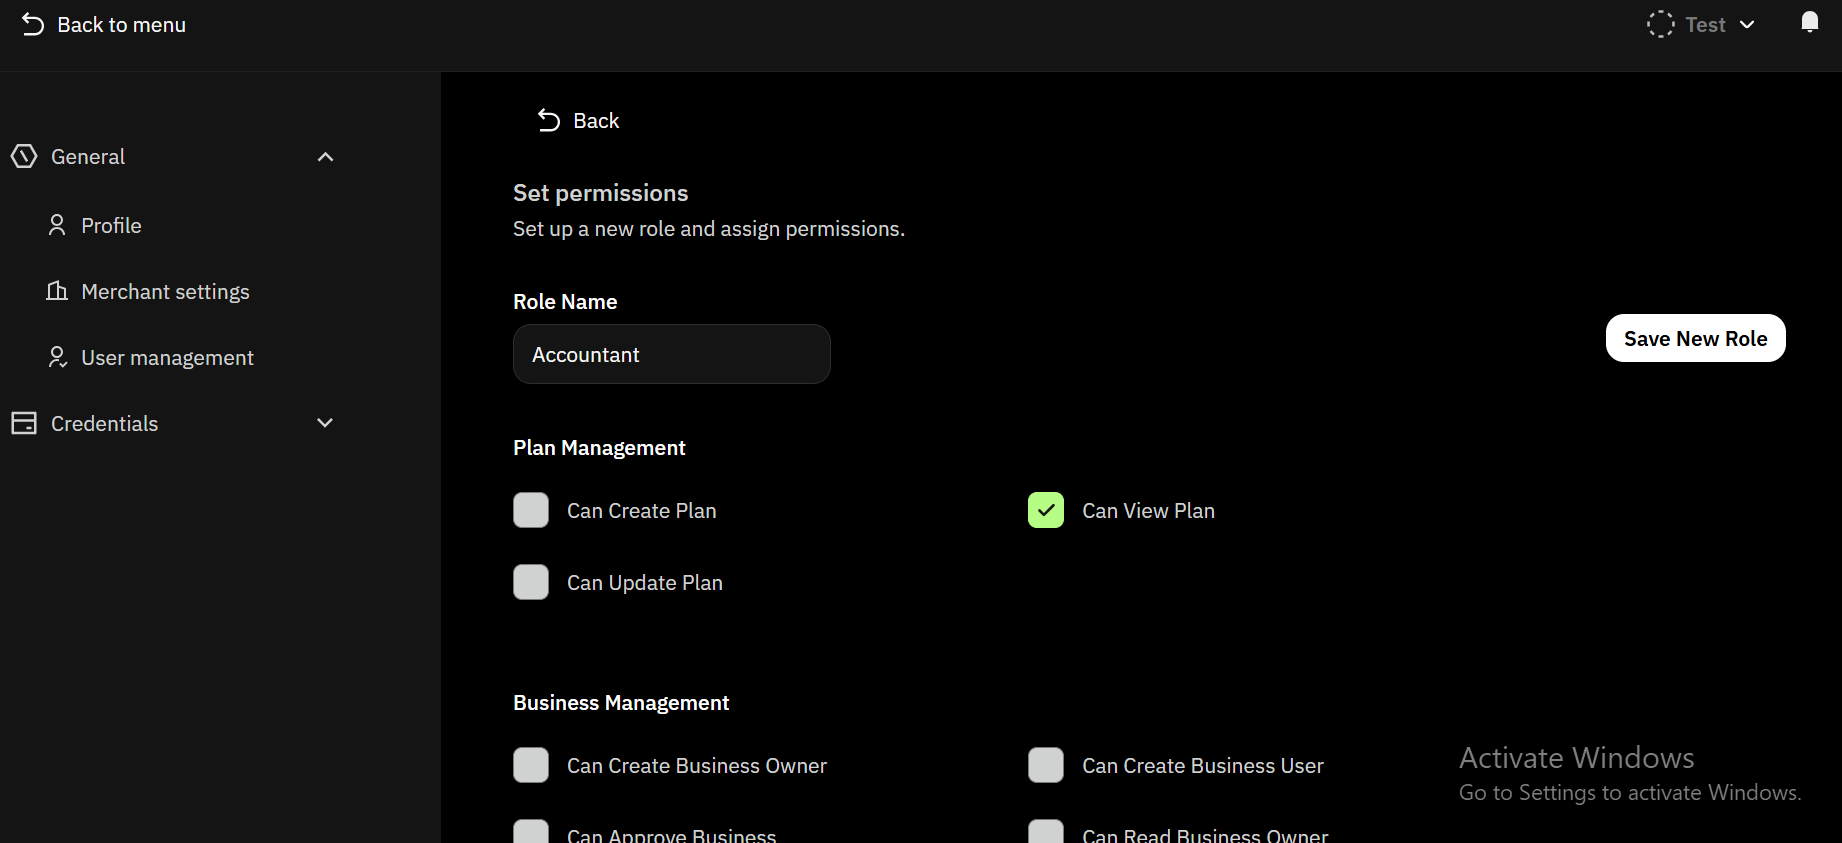 1. Choose the **Role name** you want to create.
2. Select the access you want the role to have
3. Click on **Save new role** to save the role
1. Choose the **Role name** you want to create.
2. Select the access you want the role to have
3. Click on **Save new role** to save the role
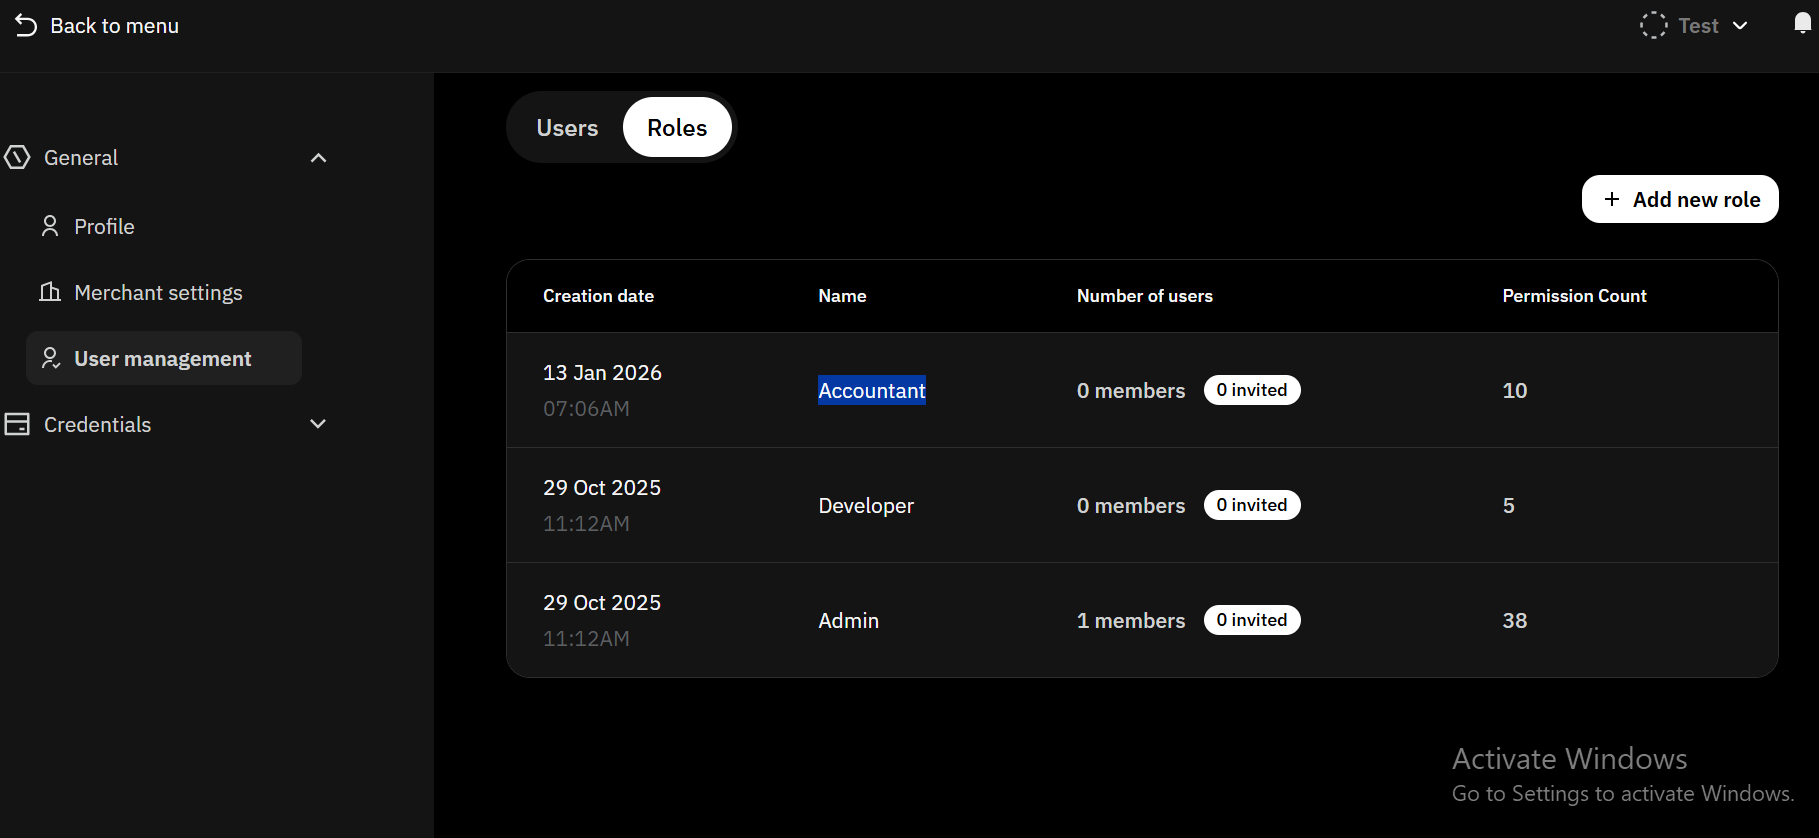 Your new role has been created for this case **Accountant role**.
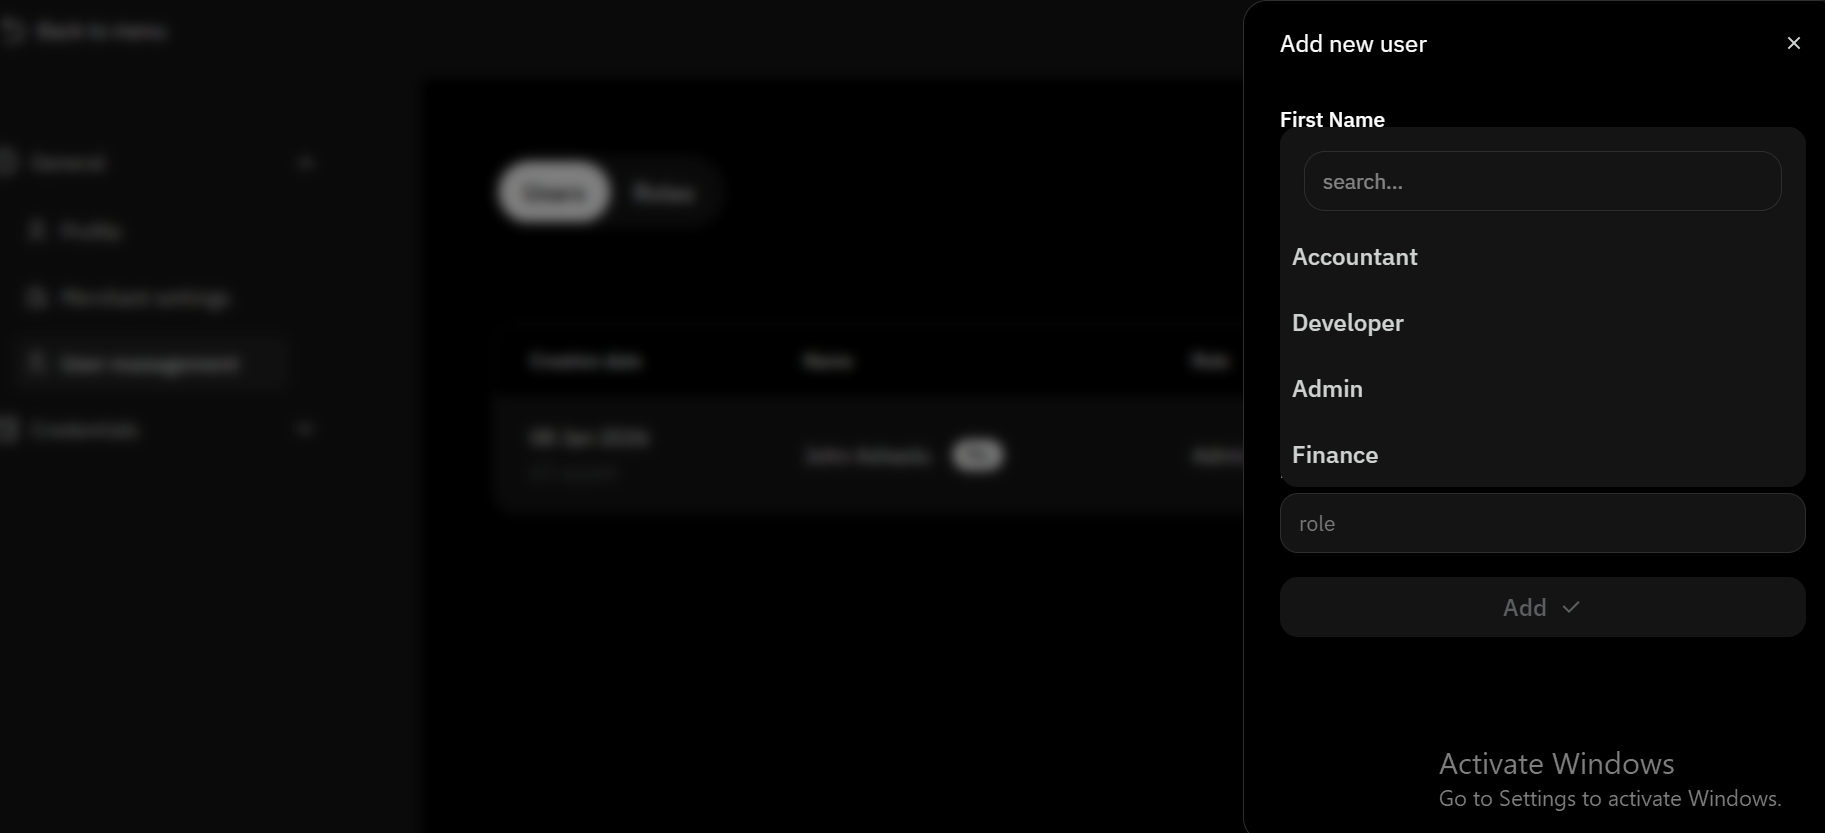 Check above on how to **Add a new team member** and you see the new custom role.
***
## Key Notes
* Only Admins can invite or manage users
* Permissions take effect immediately
***
Check above on how to **Add a new team member** and you see the new custom role.
***
## Key Notes
* Only Admins can invite or manage users
* Permissions take effect immediately
***