
Overview
HyperRails allows you to invite team members to your dashboard and control what they can access using roles and permissions.This enables secure collaboration while ensuring sensitive actions are restricted to authorized users only.
How to Add a Team Member
1
Open User Management
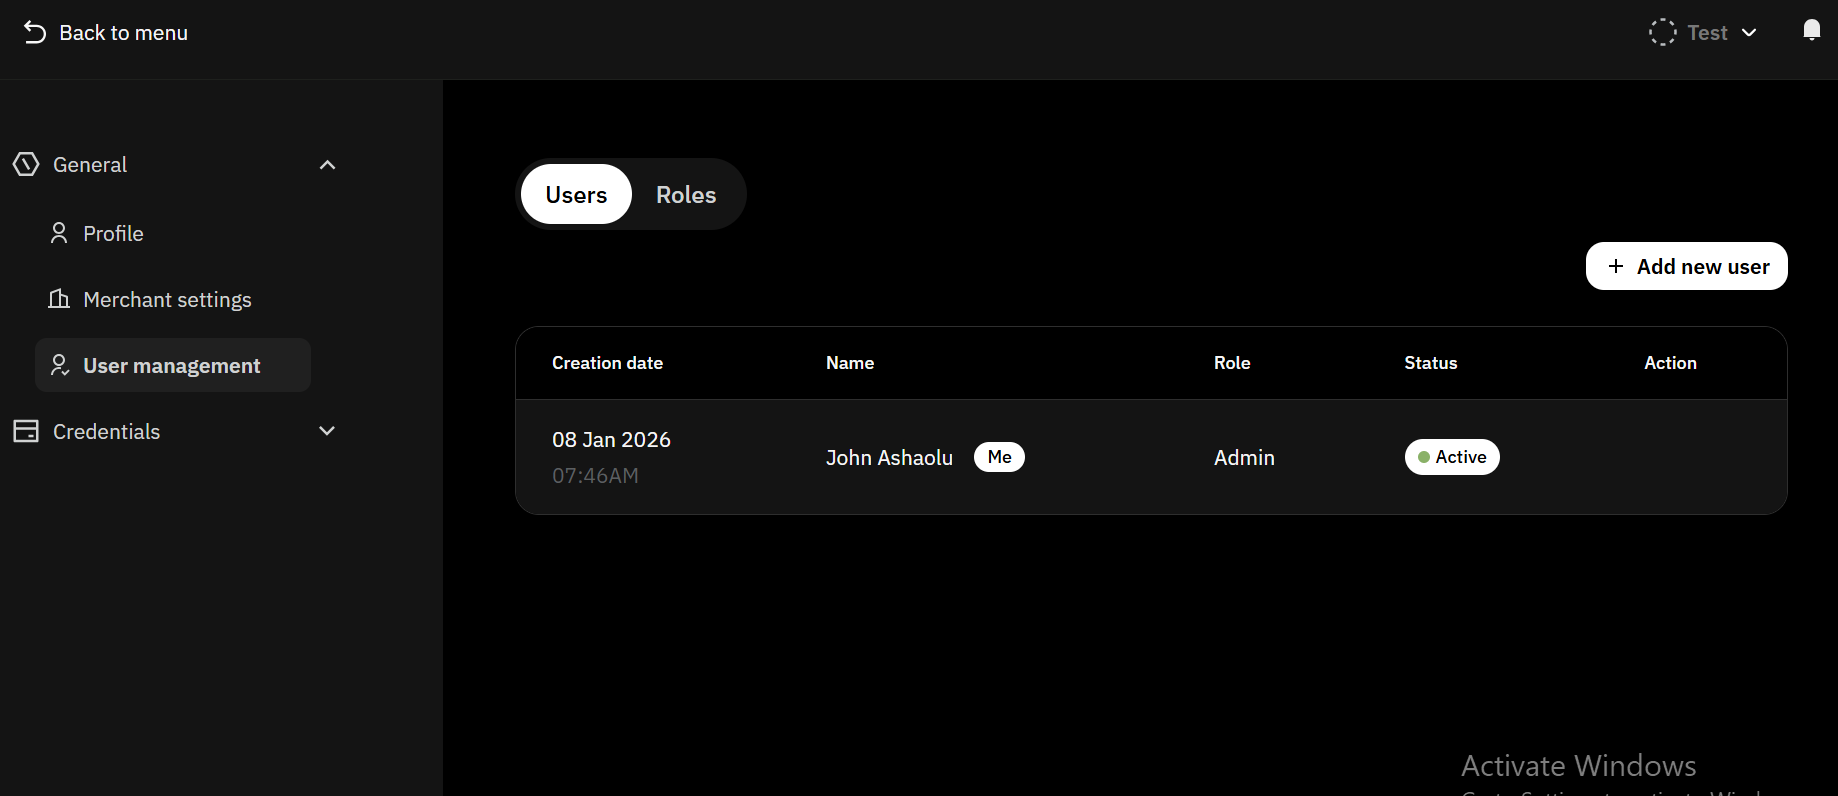
2
Invite a User
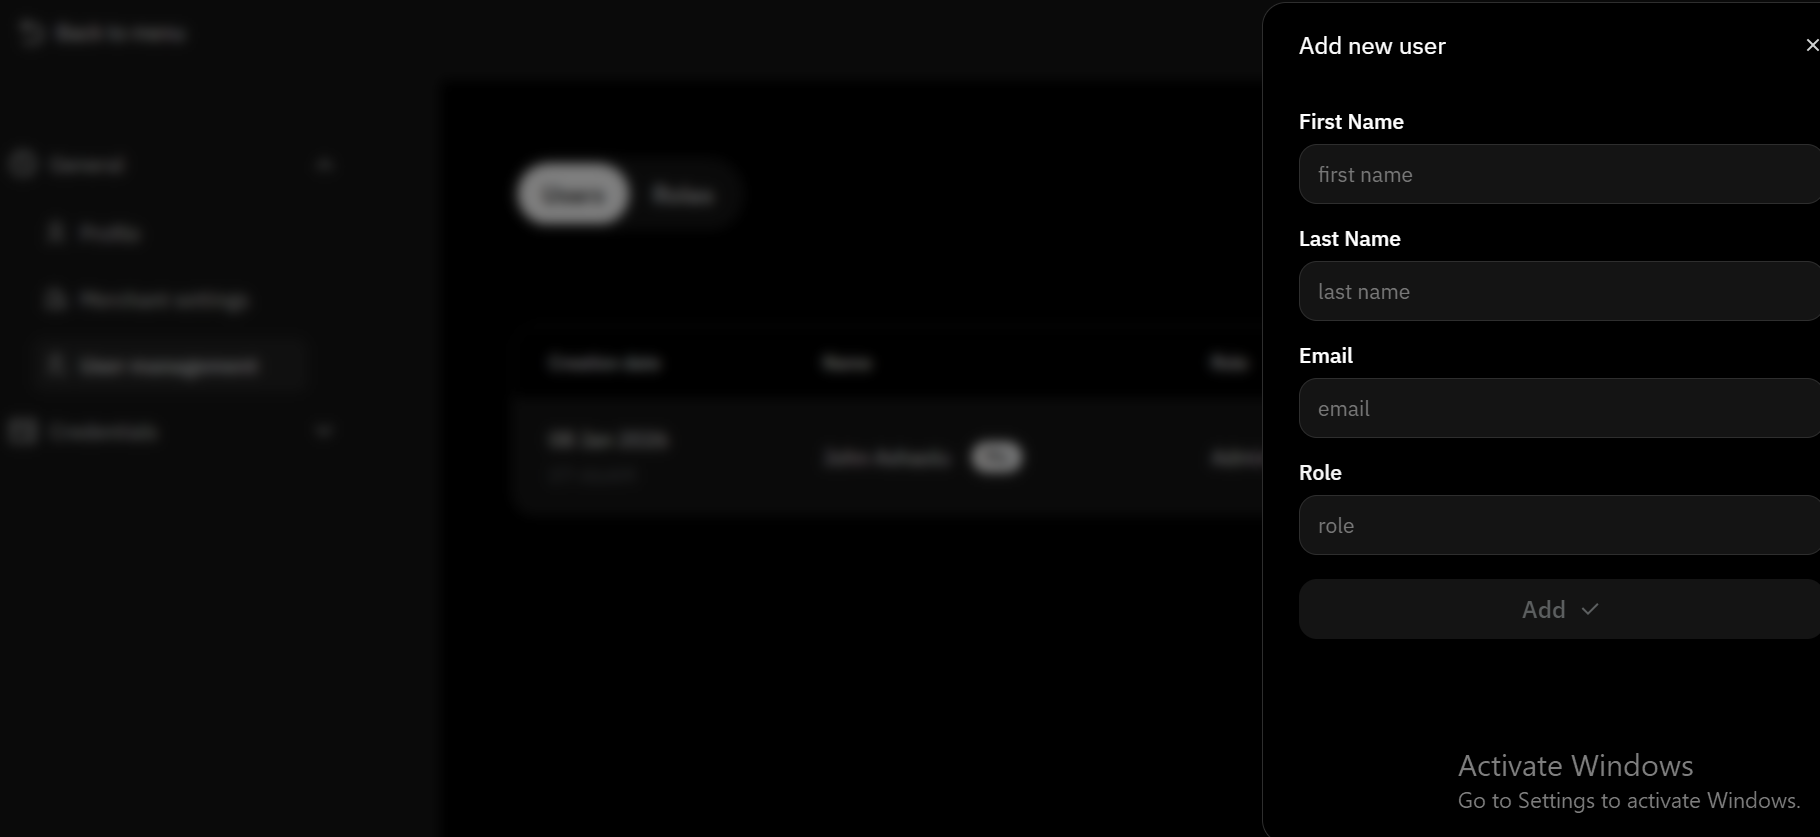
3
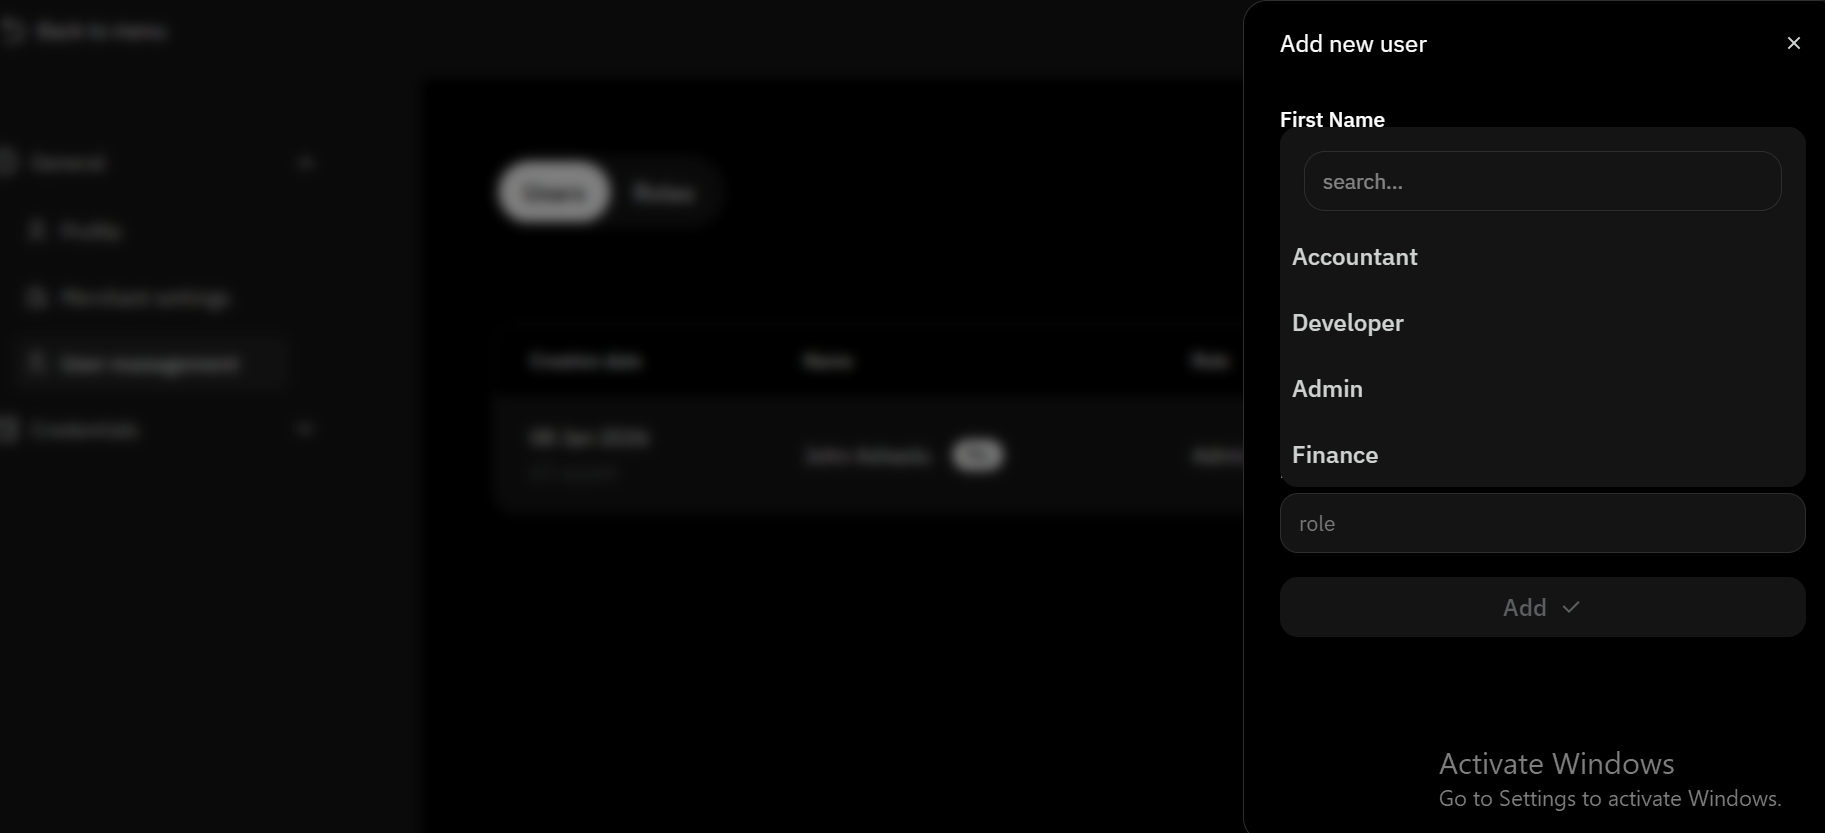
Assign a Role
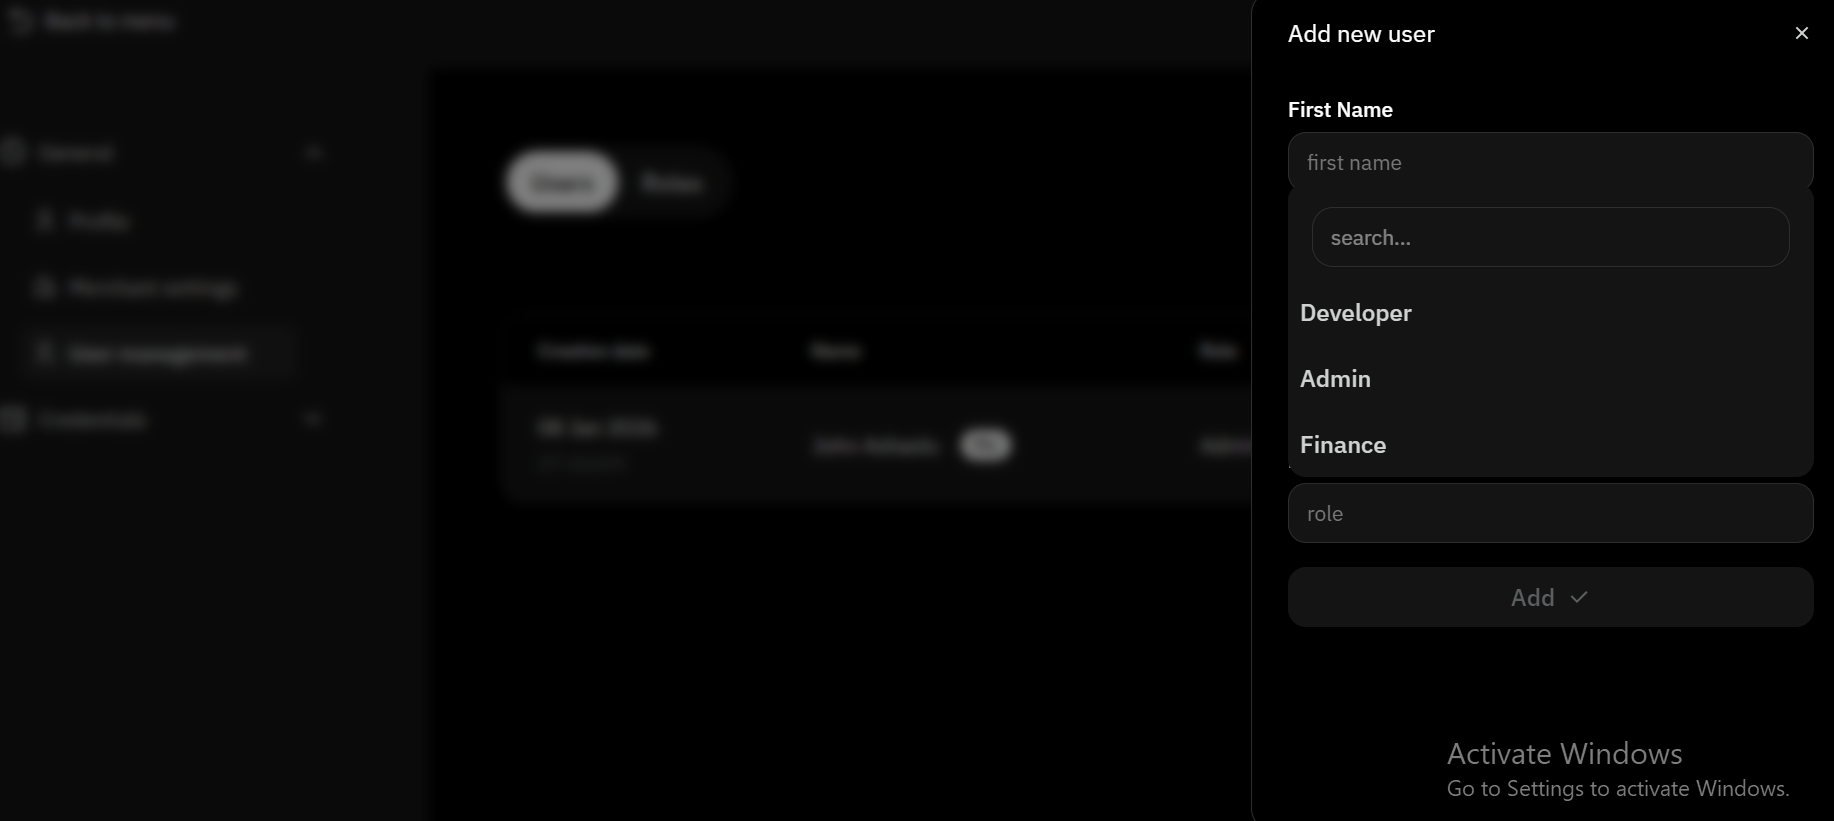
4
Send Invite
Click Add to complete the process.
How Team Members Access HyperRails
Invited users receive an email invitation.After accepting the invite, they:
- Set up their password
- Configure OTP (Authenticator App)
- Gain access based on their assigned role
Default Roles & Permissions
HyperRails provides predefined roles with different access levels:Custom Roles
Admins can create custom roles with tailored permissions to match their team’s operational needs.How to Create Custom Roles
1
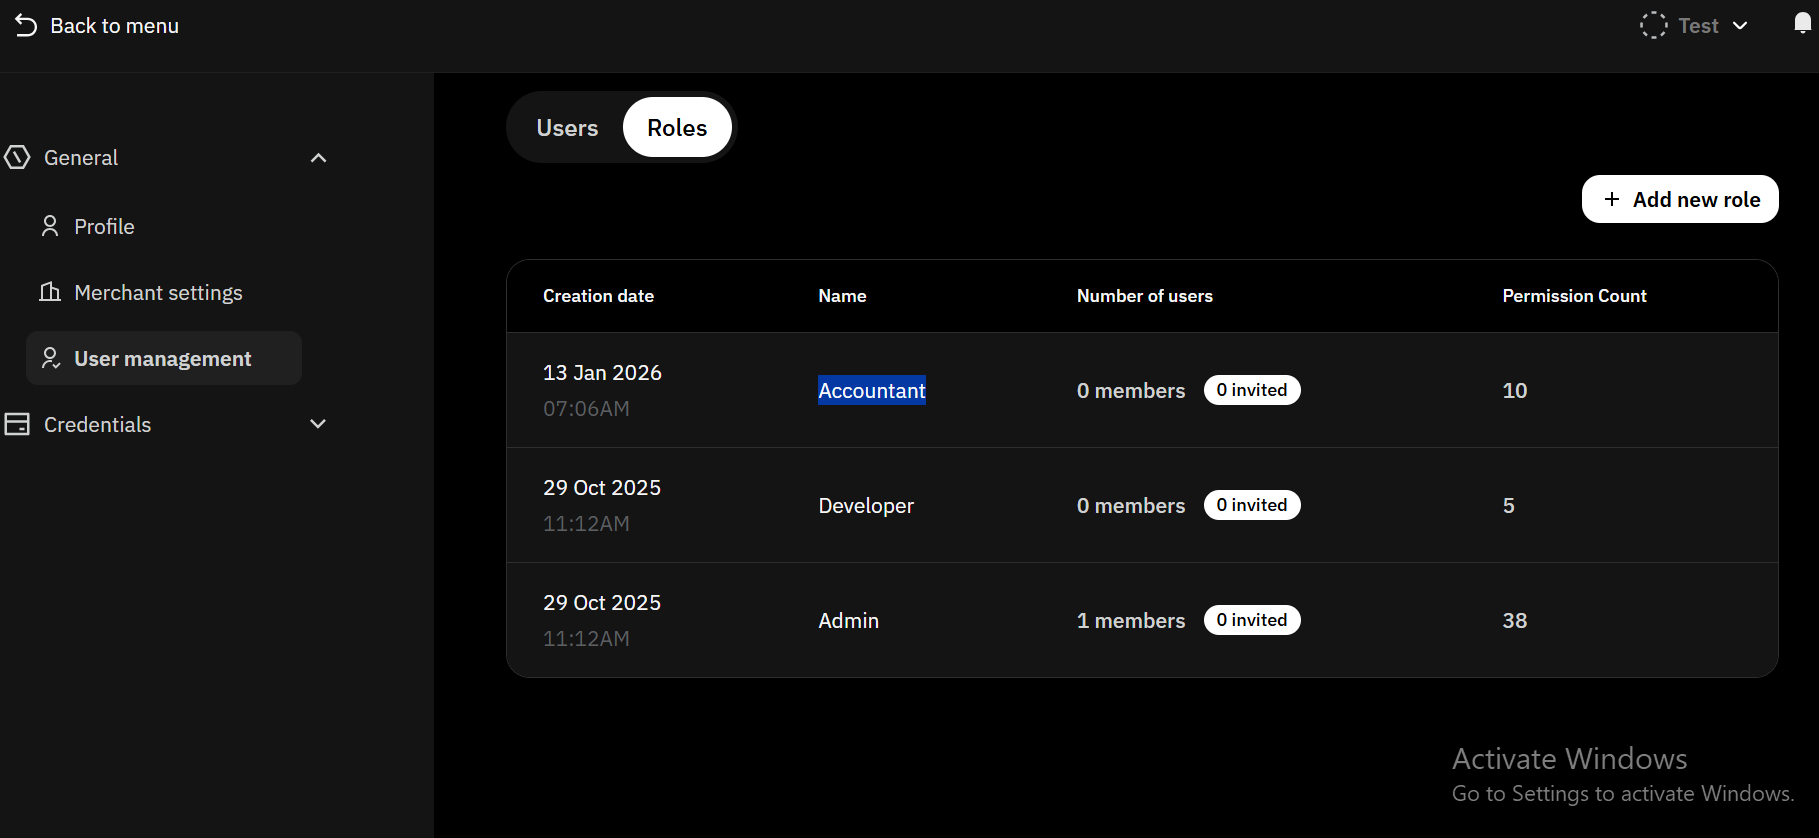
Open Roles Management
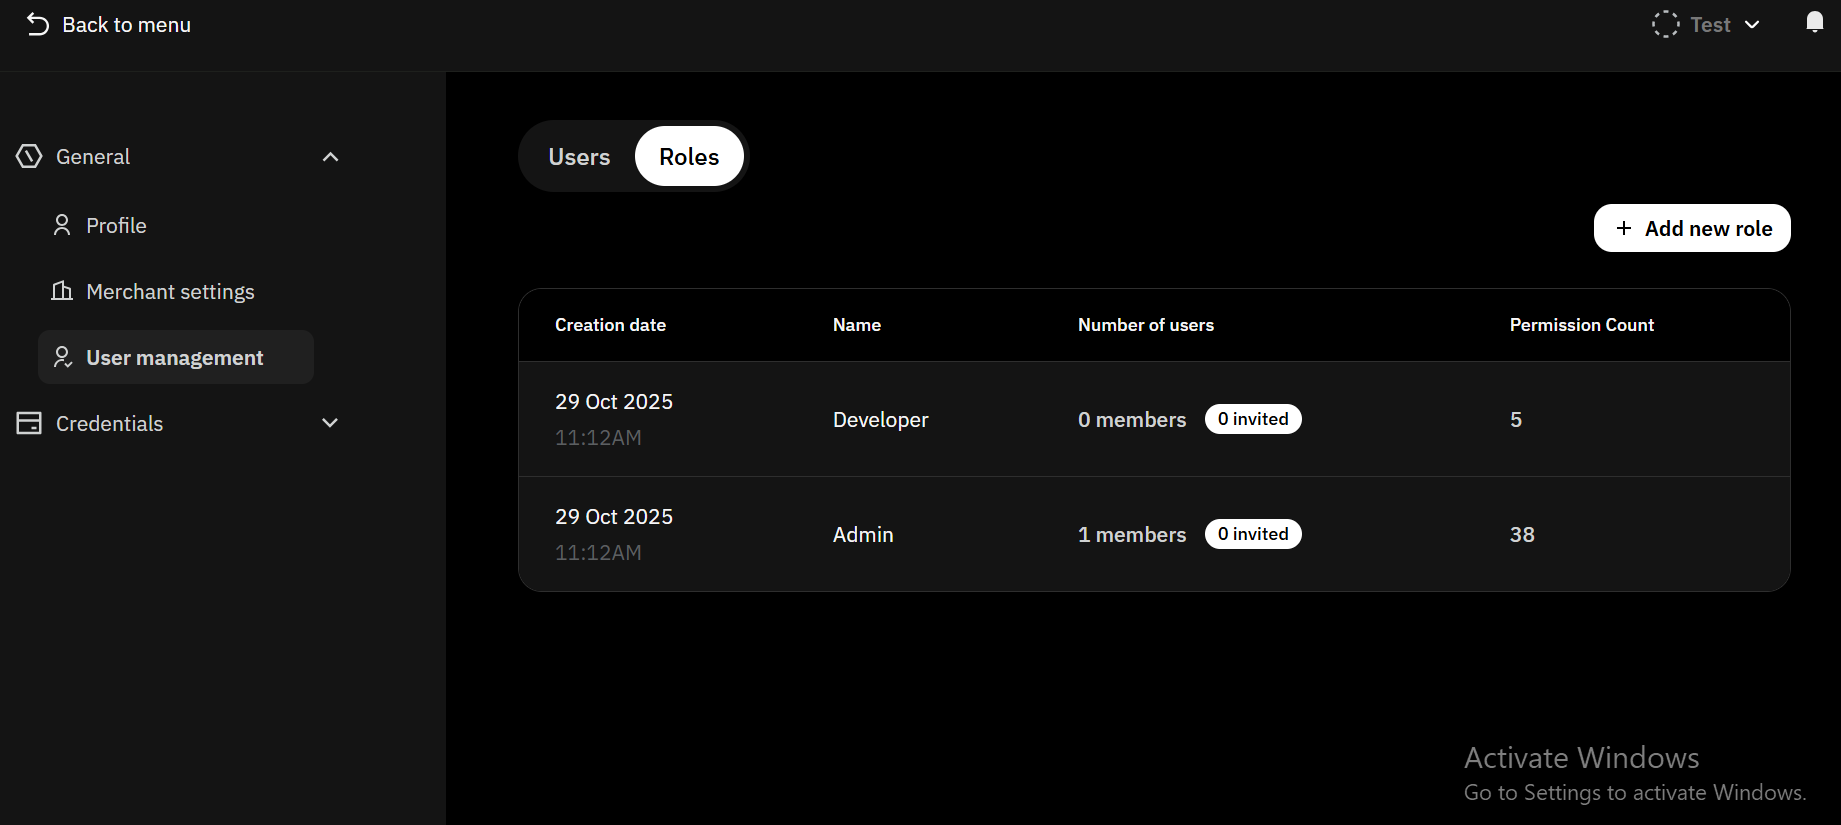
2
Create a Role
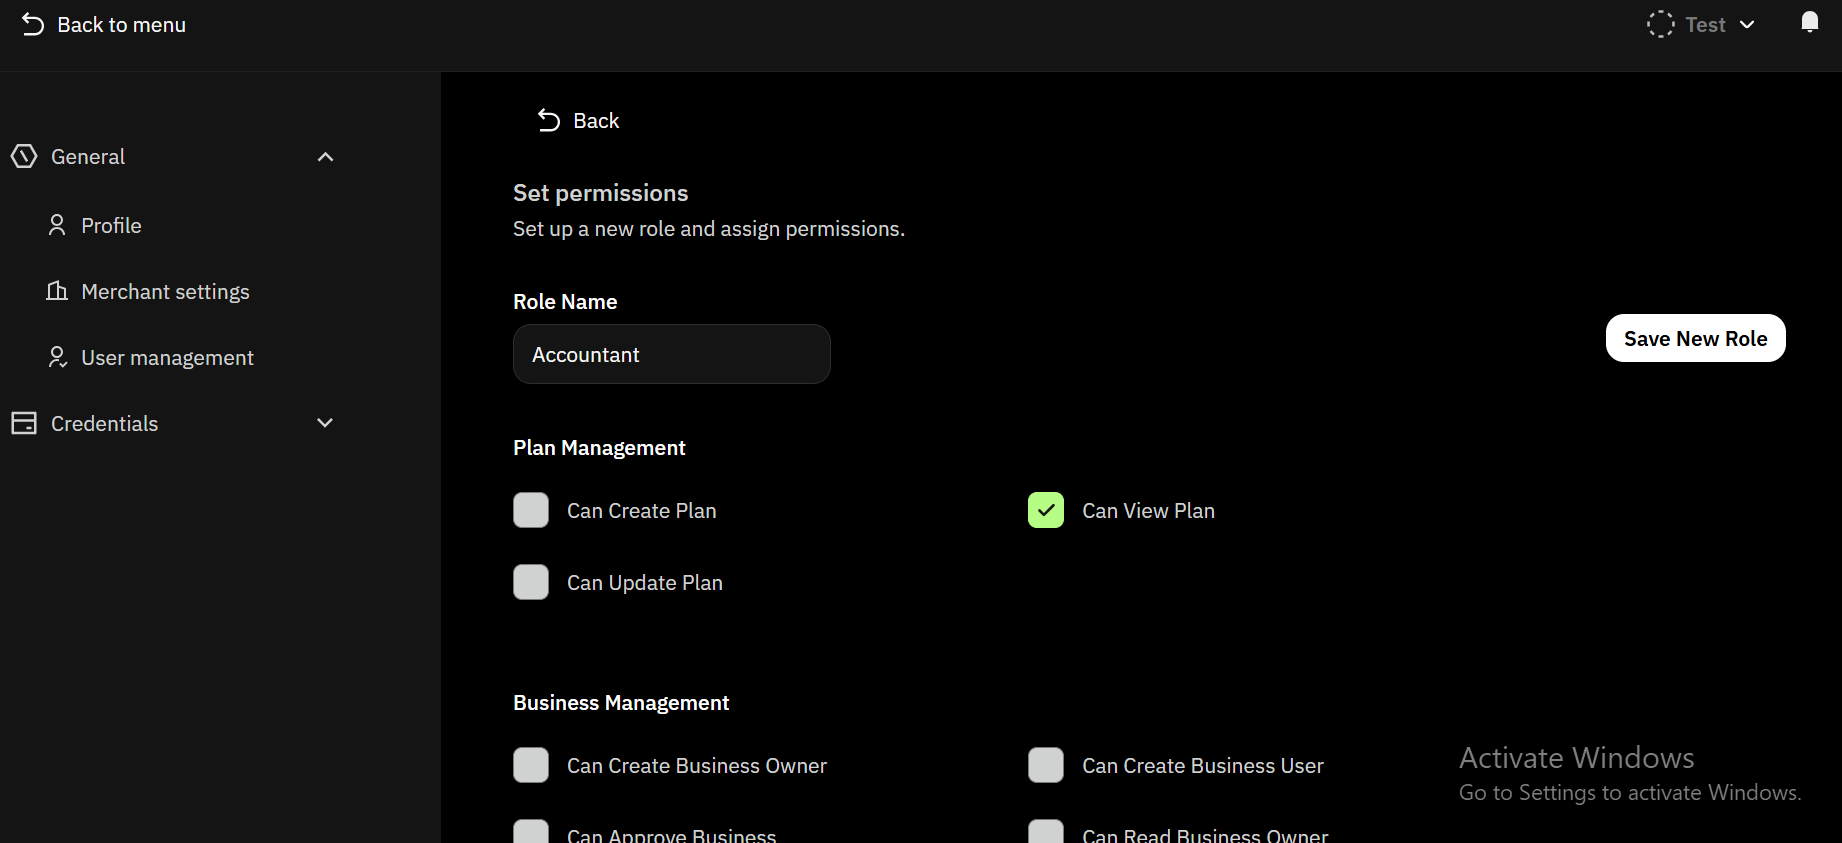
- Choose the Role name you want to create.
- Select the access you want the role to have
- Click on Save new role to save the role
3
Assign new custom Role
Key Notes
- Only Admins can invite or manage users
- Permissions take effect immediately